
About one month ago I wrote this post about a monthly craft subscription box from Stampin' Up called My Paper Pumpkin. I just recently made my October box (a Thanksgiving project - they are usually a month early when they're holiday-themed, which is nice!) and it was so much fun to make!
This kit included everything you need to make this!

Isn't it cute?? They are little pie-shaped boxes that you can use to give gifts, to take home pie leftovers, or to decorate your table!
Here are some of the supplies that came in this box.


The pie boxes came pre-scored and with peel-off adhesive to help put them together. The wide ends of each box open and close.

The box also included eight cardboard pom pom makers, which are shaped like the letter H. To make a pom pom, you wrap almost the entire amount of yarn (they had the yarn pre-measured into eight bundles) around the cardboard, then use a shorter piece to tie around the bundle very tightly (going into the slits).


Then you cut through the looped yarn, and...
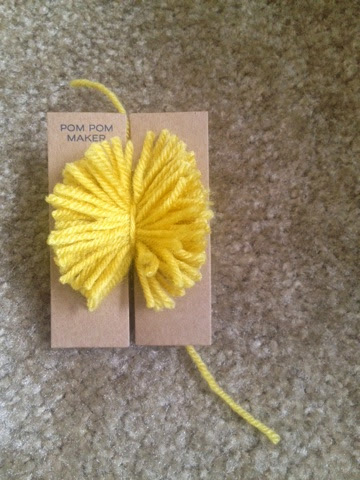
...tear the cardboard pom pom maker off! Ta-da! Aren't they so cute? You trim the pom poms so they're even.

Using the clear stamps and the ink included in this box, along with the clear block you receive in your first Paper Pumpkin, you stamp cute sayings onto the white stickers that you put on the wide ends of each pie slice. You use the smaller adhesive dots to stick the cute punch-out feathers onto the boxes (I curled them a little bit around my finger), and then use larger adhesive dots to stick on the pom poms!

I kept the whole pie and used it to decorate our apartment since we don't have that many Thanksgiving-themed decorations! I had so much fun making this project and I loved learning how to make pom poms!
I recently received my newest Paper Pumpkin and the projects are very cute! I will post all about it once I make everything!
Thanks for reading!
Very good directions for the Paper Pumpkin Project! (PPP)
ReplyDeleteThanks!! Love a fun PPP!
ReplyDelete